Guía de recompensas del Templo PoE2: qué salas merece la pena perseguir
Un buen plan de recompensas no consiste en aceptar todas las salas brillantes. Define un objetivo, mantén las salas valiosas conectadas y usa apoyo solo si mejora ese objetivo.
Escrito por
Elena Marlowe
ARPG editor and systems writer at PoE2 Temple Planner
Elena writes practical Temple planning articles focused on room-chain clarity, reward priority, and patch-aware routing.
Criterio editorial
GSC shows broad Atziri Temple and planner intent already ranking on protected homepage and guide URLs, while Similarweb surfaces low-difficulty Temple queries with reward and room-choice overlap. This page targets reward-priority decisions instead of duplicating the planner, full guide, layouts, medallions, or loot-filter pages.
En esta página
Oportunidad e intención
GSC shows broad Atziri Temple and planner intent already ranking on protected homepage and guide URLs, while Similarweb surfaces low-difficulty Temple queries with reward and room-choice overlap. This page targets reward-priority decisions instead of duplicating the planner, full guide, layouts, medallions, or loot-filter pages.
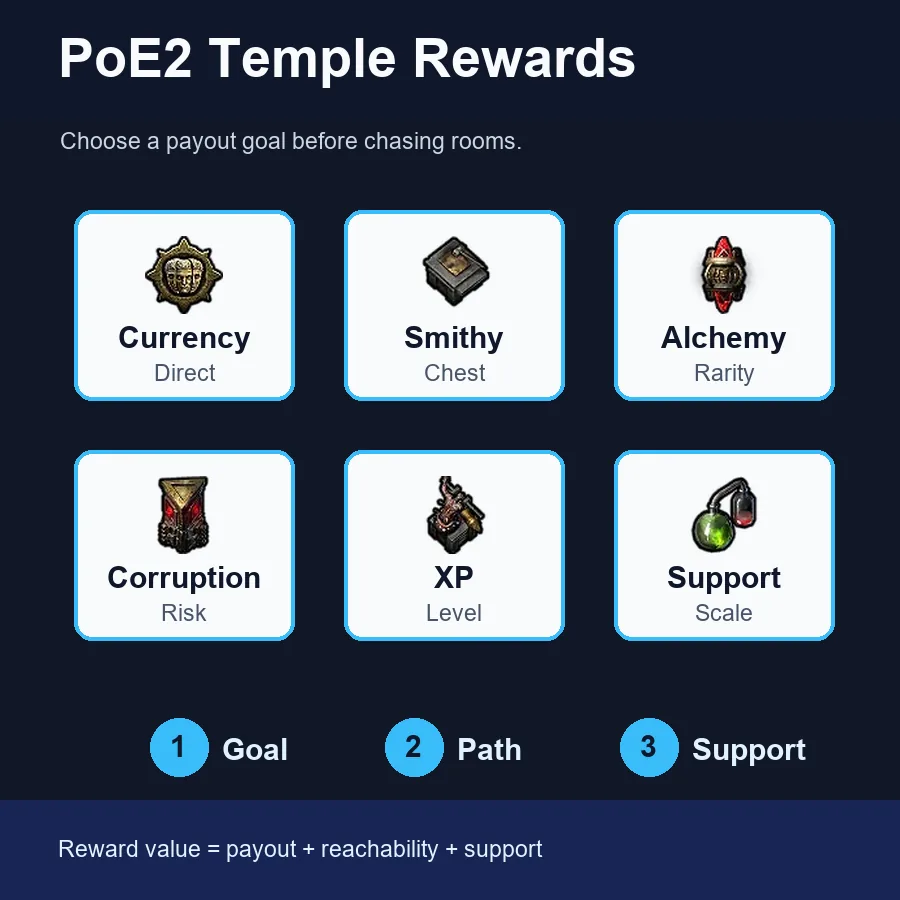
Prioridad rápida: elige recompensas por objetivo, no por rareza
Si planeas un Templo de PoE2 para recompensas, empieza por el pago que realmente quieres. La divisa y el valor de intercambio suelen preferir Smithy, Alchemy Lab, Reward Room, Spymaster, Thaumaturge y rutas de cofres alcanzables. Las rutas de XP valoran más Synthflesh Lab, Garrison, Workshop y densidad suficiente. La corrupción o los jefes necesitan una cadena más estrecha y mejor protegida.
| Objetivo | Mejores salas | Trampa a evitar |
|---|---|---|
| Currency and trade value | Smithy, Alchemy Lab, Reward Room, Spymaster, Thaumaturge | Chasing a specialist room that cannot be reached or upgraded |
| XP and leveling | Synthflesh Lab, Garrison, Workshop, Generator | Ignoring monster flow while saving only chest rooms |
| Corruption value | Corruption Chamber, Sacrificial Chamber, Thaumaturge | Mixing corruption rooms into a layout with no support chain |
| Boss or Architect push | Flesh Surgeon, Commander, route access, protected reward rooms | Spending every slot on side loot and missing the boss route |
| Recovery Temple | Reward Room, Sealed Vault, reachable T2 rooms | Forcing a perfect T3 plan after the layout is already compromised |
Qué cuenta como sala de recompensa
En la práctica, las recompensas del Templo salen de salas explícitas y de modificadores que vuelven más valiosa toda la run. Reward Room es el caso más directo porque entrega cofres especiales o pago directo. Smithy mejora la rareza de cofres, Alchemy Lab mejora la rareza de objetos de monstruos, Corruption Chamber cambia el valor de modificadores raros y Synthflesh Lab convierte la run en una ruta de experiencia.
La actualización 0.5.0 importa porque las notas oficiales indican que las Reward Rooms obtenidas tras el Architect fueron mejoradas y recibieron más variedades. Por eso la diferencia entre pago directo y sala de apoyo es una decisión real. Las de pago directo necesitan acceso; las de apoyo necesitan espacio solo si multiplican salas que ya vas a correr.
Regla rápida
Una recompensa T2 conectada que encaja con el objetivo suele superar a una T3 aislada que parece potente pero no sostiene la ruta final.
Prioridades por objetivo del Templo
No compares todas las salas en una sola tier list. Una sala excelente para XP puede ser mediocre para divisa, y una cadena de corrupción solo funciona cuando el entorno justifica el riesgo. Define primero el objetivo y luego evalúa la sala.
| Objetivo | Mejores salas | Trampa a evitar |
|---|---|---|
| Currency and trade value | Smithy, Alchemy Lab, Reward Room, Spymaster, Thaumaturge | Chasing a specialist room that cannot be reached or upgraded |
| XP and leveling | Synthflesh Lab, Garrison, Workshop, Generator | Ignoring monster flow while saving only chest rooms |
| Corruption value | Corruption Chamber, Sacrificial Chamber, Thaumaturge | Mixing corruption rooms into a layout with no support chain |
| Boss or Architect push | Flesh Surgeon, Commander, route access, protected reward rooms | Spending every slot on side loot and missing the boss route |
| Recovery Temple | Reward Room, Sealed Vault, reachable T2 rooms | Forcing a perfect T3 plan after the layout is already compromised |
Cuándo el apoyo vale más que la recompensa
Las salas de apoyo son fáciles de infravalorar porque no siempre muestran un cofre obvio. Spymaster, Workshop, Thaumaturge, Generator, Garrison y Commander pueden superar una recompensa aleatoria cuando aumentan las salas que ya definen tu plan.
Generator es base para varias mejoras, pero no paga por sí solo. Spymaster y Thaumaturge valen mucho cuando sus familias están presentes. Workshop brilla con Generator, Synthflesh, Flesh Surgeon, Transcendent Barracks o Alchemy Lab. Si faltan, una recompensa directa suele ser más simple.
- Check whether the support room affects at least two important rooms.
- Confirm the supported rooms are reachable from the entrance path.
- Prefer one strong support family over three unrelated support pieces.
- Do not protect support if the payout room itself is exposed.
Errores comunes al planear recompensas
La mayoría de Temples decepcionantes fallan antes de entrar. La sala parecía valiosa, pero no tenía ruta, familia de mejora o razón para combinarse con el resto. Esto pasa cuando eliges cada oferta de forma aislada.
| Mistake | Why it hurts | Fix |
|---|---|---|
| Taking every Reward Room | Side rooms consume path and protection budget | Connect the best payout and ignore weak side branches |
| Building currency and XP at once | Support rooms pull in different directions | Choose one main goal and one backup reward |
| Ignoring destabilisation risk | Valuable rooms can disappear after the run or boss step | Keep the important chain compact and reachable |
| Overvaluing Tier 3 alone | Tier does not matter if the room is disconnected | Treat reachability as part of reward value |
Flujo práctico antes de entrar
Usa este flujo cuando la consola ofrece opciones tentadoras y necesitas decidir rápido. Mantiene el plan legible y evita el resultado de buenas salas en un mal Templo.
- Name the payout: currency, XP, corruption, boss, or recovery.
- Pick one direct reward room or one support family as the anchor.
- Use the planner to verify pathing and Generator coverage before committing.
- Upgrade only the rooms that improve the anchor goal.
- Before entering, check whether any high-value room is unreachable or exposed.
Open the Temple planner
Test whether the reward chain is reachable before spending rooms.
Read the room connection cheat sheet
Check which support family the reward room belongs to.
Compare best Temple layouts
Use preset goals when you do not want to build from scratch.
Review medallion slots
Decide which saved medallions support the next reward plan.
Preguntas frecuentes
Sources and further reading
These sources support the patch and room-reward notes used in this guide.
- Path of Exile 2 Content Update 0.5.0 patch notes - Official source for Reward Room, medallion, room upgrade, and Temple rule changes.
- PoE2DB: Atziri's Temple - Reference for current Temple terminology and patch-note mirrored mechanics.
- Mobalytics Vaal Temple overview - Practical overview of Temple Console, room cards, medallions, grid planning, and room rewards.
- Read the room connection cheat sheet - Internal reference for support families, Generator coverage, and room connection checks.
About the author
Elena Marlowe
Elena Marlowe writes Temple strategy content for PoE2 Temple Planner with a focus on practical room priorities, patch-aware mechanics, and readable decision frameworks.
Plan the reward before you spend the room
Open the planner to test whether the reward chain is reachable, then compare the cheat sheet if the support family is unclear.